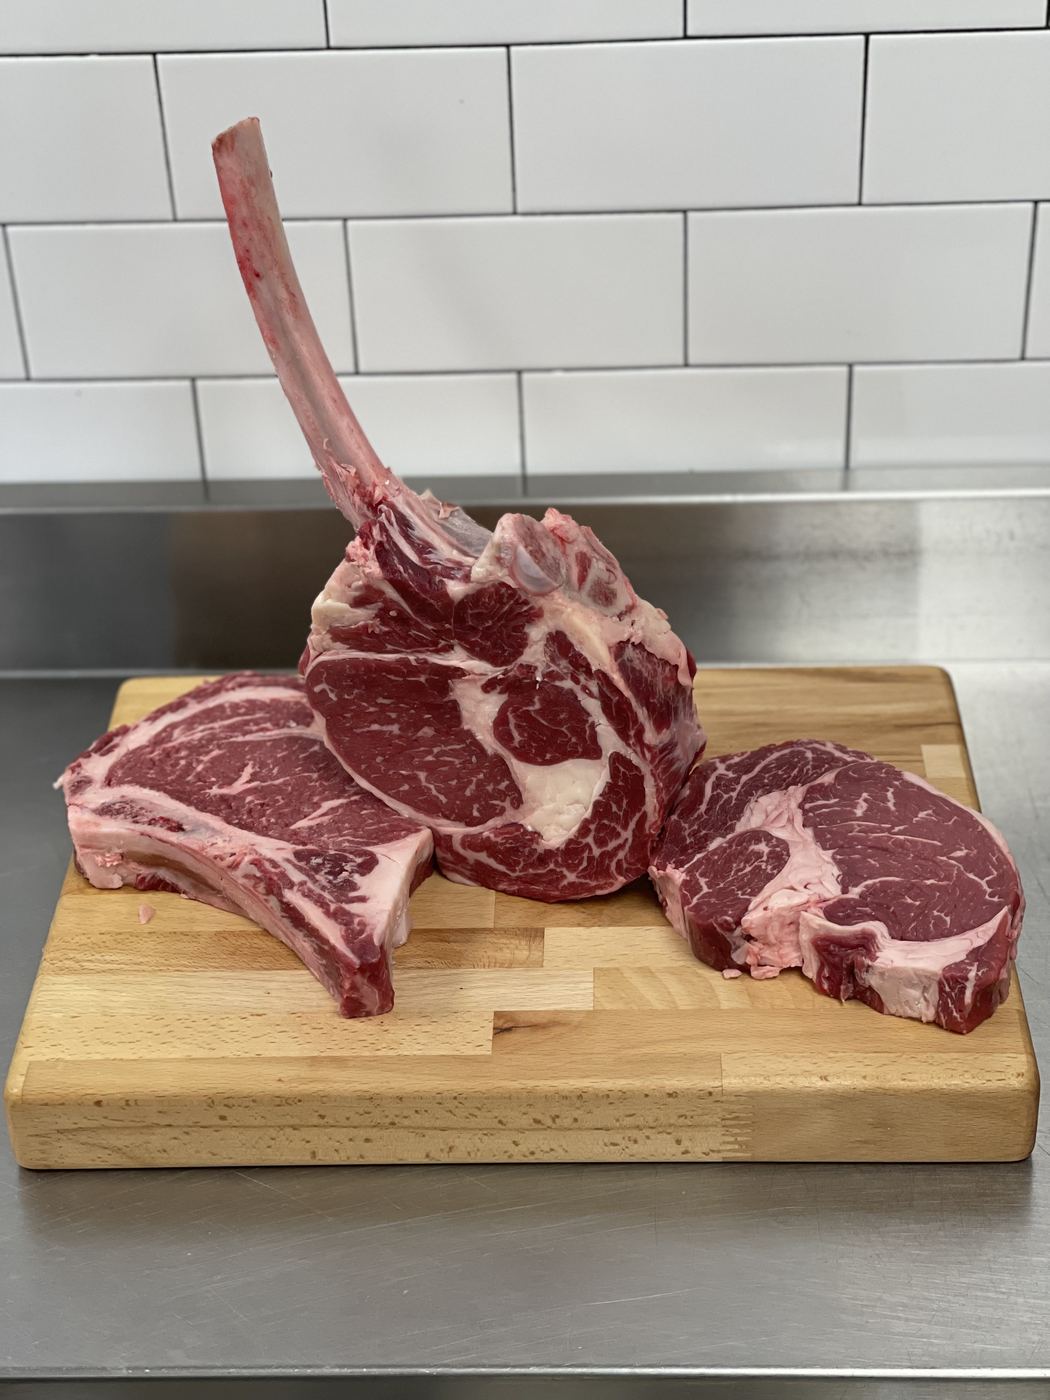

The most reliable way to cook prime rib low and slow is to roast it at a low oven temperature until it reaches your target internal temperature, then finish with a short blast of high heat to brown the crust. This approach cooks the meat evenly edge to edge, keeps it juicy, and still delivers a deeply browned exterior. A digital thermometer, not a clock, tells you when it’s done. We’ll cover timing estimates and alternative methods below.
TL;DR:
- Salt the roast 24 to 48 hours ahead and refrigerate it uncovered; a dry surface browns better, while a rack allows air to circulate.
- At 225°F to 250°F, pull at 120°F for a 130°F medium rare finish; rest, then sear at 500°F to 550°F for 6 to 10 minutes.
- Health Canada recommends whole beef reach 145°F for medium rare; mechanically tenderized roasts must meet that minimum, so ask your butcher whether the roast was tenderized.
- A 6 to 8 pound roast typically needs 3 to 4 hours at 225°F to 250°F, but oven accuracy, roast shape, and bones can shift timing.
Table of Contents
- The Reverse-Sear Method for Low and Slow Prime Rib
- How Long Does Prime Rib Take to Cook Low and Slow?
- Other Ways to Cook Prime Rib: Slow Cooker and High-Heat Methods
- Choosing and Prepping the Right Prime Rib Roast
- Seasoning and Surface Prep for a Better Crust
- A Step-by-Step Timeline for a 6 to 8 Pound Bone-In Roast
- Fixing Common Prime Rib Mistakes
- Safe Internal Temperatures for Prime Rib
- Thermometers, Racks, and Oven Setup That Actually Help
- What Our Butchers Recommend When You Buy Your Roast
- Side Dishes and Serving Tips for Prime Rib
- Storing and Reheating Leftover Prime Rib
- Why I Trust the Low and Slow Method for Entertaining
- Ordering Your Prime Rib or Booking Catering With Us
- FAQ
- Sources
The Reverse-Sear Method for Low and Slow Prime Rib
This method, often called reverse searing, flips the old habit of blasting a roast with heat first. Instead, you cook gently to a target temperature, then sear at the end. Serious Eats’ testing on prime rib found that this order minimizes the thick gray overcooked band that forms when the outside cooks much faster than the center, and it produces pink, even doneness from edge to edge.
Start the night before if you can. Season the roast and let it sit uncovered in the refrigerator so the surface dries out, which helps browning later. Before cooking, set the roast fat cap up on a rack inside a rimmed pan so hot air can circulate underneath and around it. Pat the surface dry one more time with paper towels.
Pick your low-temperature range based on how much time you have and how much you want to limit the gray band:
- 225°F to 250°F is the standard low-and-slow range: slow enough to cook evenly, fast enough to finish in a reasonable window for a weeknight or holiday dinner.
- 150°F to 200°F takes considerably longer but shrinks the gray band even further and gives you a wider buffer if guests run late.
- Choose based on your schedule, not a fixed rule. Lower is gentler on the meat but demands more patience.
Pull temperatures matter more than any oven setting. Because the roast keeps cooking after it leaves the oven (carryover), you pull it 5 to 10 degrees Fahrenheit below your final target. For rare, pull around 115°F to finish near 125°F. For medium-rare, pull around 120°F to finish near 130°F. For medium, pull around 130°F to finish near 140°F.
Once the roast hits its pull temperature, let it rest, then crank the oven to 500°F to 550°F for the finishing blast. Serious Eats recommends 6 to 10 minutes in a fully preheated oven at this stage. Because the surface has already dried out during the slow cook, it browns fast without pushing the interior much past where you want it.

Probe placement decides whether your thermometer readings mean anything. Insert the probe into the geometric center of the thickest part of the roast, running parallel to any bone but never touching it. Touching bone gives you a falsely high reading because bone conducts and holds heat differently than muscle. For a boneless roast, center the probe in the largest cross-section. A leave-in probe thermometer lets you track the climb in real time; an instant-read thermometer works fine if you check periodically, though you’ll open the oven more often.
Pro Tip: Cooking to temperature instead of time means you can let the roast rest, almost indefinitely within reason, until your guests are ready, then finish it with the high-heat blast right before serving.
How Long Does Prime Rib Take to Cook Low and Slow?
Timing estimates are only a planning tool. The real marker of doneness is internal temperature, and ovens, roast shapes, and bone content all shift the clock in ways a printed chart can’t predict.
That said, rough windows help you plan a dinner. At 225°F to 250°F, BBQ Report’s cooking data suggests these approximate ranges:
- 4 to 5 pound roast: roughly 2 to 2.5 hours to reach a medium-rare pull temperature.
- 6 to 8 pound roast: roughly 3 to 4 hours.
- 10 to 12 pound roast: roughly 4 to 5 hours.
Several factors push these numbers around. Home ovens often run 10 to 25 degrees hotter or cooler than their display suggests, which changes cook time without you realizing it. A short, thick roast cooks differently than a long, narrow one even at the same weight. Bone-in roasts take a bit longer than boneless because the bone adds thermal mass that absorbs heat before the surrounding meat catches up. Heavily marbled roasts also cook slightly differently than lean ones, since fat conducts heat more slowly than muscle.
Build in slack. If the roast reaches its pull temperature early, tenting it loosely and holding it in a warm, low oven, around 200°F to 250°F, keeps it ready without overcooking, according to BBQ Report’s resting guidance. Smaller roasts generally rest for 15 to 30 minutes; larger ones can rest for up to an hour or more before the final sear. Expect 5 to 10 degrees of carryover cooking during that rest, depending on how hot your cooking temperature was.
Other Ways to Cook Prime Rib: Slow Cooker and High-Heat Methods
The reverse sear isn’t the only workable method, and some situations call for a different approach.
- Slow cooker: Sear the roast in a hot pan first to build some crust, then transfer it to a slow cooker on LOW until it hits your target internal temperature. This frees up oven space for sides, but the trade-off is a softer, less crisp exterior and no true high-heat finish once it’s in the slow cooker.
- Traditional high-heat start: Searing at 450°F to 500°F for 15 to 20 minutes before dropping the oven to a lower finishing temperature can work when you want color early and don’t mind a wider gray band around the edges. It suits cooks who prefer to multitask the oven temperature drop rather than manage a separate finishing blast.
- 500°F “no-peek” method: This relies on a fixed cooking time per pound at a constant high heat, then the oven is turned off and the roast sits inside, using residual heat to finish. It’s convenient but highly oven-dependent since ovens hold heat differently, and an inaccurate oven can leave you with an undercooked or overcooked result with no way to check progress until the door opens.
For most home cooks aiming for consistent, repeatable results, the low-and-slow plus high-heat finish remains the most forgiving option because it relies on temperature readings rather than guesswork about how your particular oven behaves.
Choosing and Prepping the Right Prime Rib Roast
Bone-in and boneless roasts each have a case. Bone-in holds more flavor during cooking and gives you a natural portioning guide when carving, since each rib roughly marks a serving. Boneless is easier to carve and fits a crowded oven more predictably because it’s more uniform in shape.
Marbling, the visible flecks of fat running through the muscle, matters as much as the grade on the label. More marbling means more basting from within as fat renders during the slow cook, producing a juicier, more tender result. Ask your butcher about the marbling you’re looking at, not just the grade, since marbling can vary within the same grade.
For portioning:
- Bone-in: plan for about 1 pound per person.
- Boneless: plan for about 0.5 to 0.75 pounds per person.
- Leftovers: add roughly another 0.5 pound per person if you want sandwiches or hash the next day.
Trimming and tying affect cook time more than most home cooks expect. A roast with excess surface fat trimmed away cooks a bit faster and browns more evenly, while one left untied can cook unevenly if the shape is irregular. Asking your butcher to tie the roast into a uniform cylinder before you take it home solves most of this.
Seasoning and Surface Prep for a Better Crust
Salt does double duty on prime rib: it seasons the meat and, given enough time, it also dries the surface, which is what produces real browning instead of a steamed, pale crust.
Salt the roast 24 to 48 hours before cooking and leave it uncovered in the refrigerator. The salt draws moisture to the surface initially, then reabsorbs into the meat while the exposed surface air-dries, a combination that research on low-temperature cooking also ties to improved texture during slow cooking.
- Keep rubs simple: coarse salt, cracked black pepper, and garlic or rosemary cover most tastes without overwhelming the beef.
- Apply the dry rub right after salting, before the roast goes into the refrigerator to air-dry.
- Hold any compound butter until after the low-temperature phase, right before the high-heat finish, since butter applied earlier can interfere with the surface drying that makes browning possible.
Pro Tip: If you want garlic or herb flavor baked into the crust rather than just melted on top, mix it into the dry rub instead of the butter and save a fresh pat of compound butter for serving.
A Step-by-Step Timeline for a 6 to 8 Pound Bone-In Roast
Here’s a complete plan using a 6 to 8 pound bone-in roast at 225°F as a working example.
Before you start:
- Confirm your oven’s actual temperature with a separate oven thermometer, since built-in dials can run noticeably off.
- Have a leave-in probe thermometer or instant-read thermometer ready and tested.
- Set a roasting rack inside a rimmed pan.
Timeline:
- 24 to 48 hours ahead: Salt generously and refrigerate uncovered.
- 1 to 2 hours ahead: Apply your dry rub and let the roast sit at room temperature briefly while the oven preheats to 225°F.
- Low cook: Roast fat side up for roughly 3 to 4 hours, according to BBQ Report’s timing ranges, checking with your probe starting around the 2.5 hour mark.
- Pull point: Remove the roast once it reaches 5 to 10 degrees below your final target, for example 120°F for a medium-rare finish of 130°F.
- Rest: Tent loosely with foil and rest 15 minutes to an hour, depending on how far ahead of serving you are.
- High-heat finish: Preheat the oven to 500°F to 550°F, then return the roast uncovered for 6 to 10 minutes until the crust browns.
- Final rest: Let it sit 10 minutes before carving to let juices settle.
If guests run late, hold the rested roast in a 200°F to 250°F oven rather than letting it sit at room temperature, then move straight into the high-heat finish once everyone’s ready.
Carving:
- Remove the rib bones in one piece by running a knife along the base of the bones, then set them aside for serving or saving.
- Slice across the grain in even widths so every piece is tender rather than chewy.
- Carve only what you’ll serve immediately to keep the rest of the roast warm and intact.
Fixing Common Prime Rib Mistakes
Most prime rib problems trace back to temperature control or thermometer placement rather than the recipe itself.
- Thick gray band: Usually caused by cooking at too high a temperature from the start. Dropping to the 225°F to 250°F range and relying on a finishing blast instead of a high-heat start fixes most of this.
- Pale, steamed-looking exterior: Comes from skipping the air-dry step or wrapping the roast in foil during the low cook. Letting the surface dry uncovered in the refrigerator and skipping any covering during roasting solves it.
- Roast reads done but center looks underdone: Usually a probe placement error, often because the tip is touching bone or sitting too close to the pan. Reposition the probe in the thickest part of the meat away from bone and re-check.
- Overcooked after resting: Often means the pull temperature was too close to the final target. Pull 5 to 10 degrees earlier next time to account for carryover cooking.
Safe Internal Temperatures for Prime Rib
Health Canada sets clear internal temperature targets for whole cuts of beef: 63°C (145°F) for medium-rare and 71°C (160°F) for medium, confirmed with a digital thermometer rather than color or time. These figures matter even if your preferred doneness runs below medium, since they represent the baseline Health Canada considers safe for a solid muscle cut like prime rib.
One exception worth knowing: mechanically tenderized beef carries different labeling and safety guidance because the tenderizing process can drive surface bacteria deeper into the cut. Health Canada’s guidance on mechanically tenderized beef recommends cooking these cuts to the full 63°C (145°F) minimum with no exceptions for a less-done center. Ask your butcher whether your roast has been mechanically tenderized before deciding how far below that line you’re comfortable going, and remember that carryover cooking will push the internal temperature up another 5 to 10 degrees after you pull it from the oven.
Thermometers, Racks, and Oven Setup That Actually Help
An inaccurate oven undermines every other step in this guide. Check yours with a standalone oven thermometer placed on the center rack, then adjust your set temperature up or down to compensate for any gap you find.
- Leave-in probe thermometers let you track temperature continuously without opening the oven, which is useful for long, slow cooks where you don’t want to lose heat repeatedly.
- Instant-read thermometers are cheaper and accurate but require opening the oven each time you check, which can be done sparingly near the end of the low cook.
- A rack inside a rimmed roasting pan keeps the roast out of its own drippings, letting hot air circulate on all sides for more even cooking.
What Our Butchers Recommend When You Buy Your Roast
When you pick up a roast, ask about the bone count and whether you want it Frenched, meaning the meat is trimmed away from the top of the rib bones for a cleaner presentation and easier carving between the bones. A butcher can also cut a roast to a specific weight or number of ribs if you’re working around a guest count rather than a standard size.

Different trims change cook time slightly: a roast with a thick fat cap left on insulates the meat a bit more, while one trimmed closer cooks a touch faster and browns sooner. If you want extra flavor built in, consider using marinades or a compound butter to apply after the low cook, right before the high-heat finish, for a browned, flavorful crust.
Side Dishes and Serving Tips for Prime Rib
Prime rib’s richness pairs best with sides that offer contrast rather than more heaviness. Horseradish cream or a sharp mustard cuts through the fat, while a simple green salad or roasted green beans add acidity and crunch against the soft texture of the meat.
Classic pairings still earn their place: Yorkshire pudding, garlic mashed potatoes, and a light au jus made from the roasting pan drippings all complement the beef without competing with it. Roasted root vegetables, tossed in the same oven during the low-temperature phase, make efficient use of oven space and finish around the same time as the roast.
For serving, carve only as much as you’ll plate immediately and keep the rest of the roast loosely tented so it stays warm. Set out horseradish, au jus, and any compound butter on the table separately so each guest can season to taste rather than having the whole roast dressed the same way. If you’re serving a crowd, slicing a mix of end pieces (more well-done) and center pieces (more rare) lets guests choose their preferred doneness from the same roast.
Storing and Reheating Leftover Prime Rib
Refrigerate leftover prime rib within two hours of cooking, wrapped tightly or in a sealed container, and plan to use it within three to four days. For longer storage, slice and freeze portions in airtight bags, where they’ll hold well for a few months.
To reheat without drying it out, warm slices gently in a low oven, around 250°F, covered loosely with foil, until just warmed through rather than cooked further. A quick pass in a hot skillet works for thin slices if you want a bit of fresh sear on the edges. Avoid the microwave for anything thicker than a thin slice, since it tends to cook the edges hard before the center warms, undoing the even doneness you worked for the first time around.
If you’re holding a larger reheated portion for a buffet or a gathering, a controlled holding setup at a steady low temperature does a better job than an oven you’re opening and closing repeatedly, a principle commercial kitchen equipment guidance on food warmers lays out in more detail for anyone managing larger quantities.
Why I Trust the Low and Slow Method for Entertaining
I keep coming back to the low-and-slow plus high-heat finish because it removes guesswork from the one meal where guesswork is most expensive. Once the roast hits its pull temperature, it can rest for a while without punishing you for a delayed dinner, which makes it the most forgiving option I’ve found for a table full of people who never arrive exactly on time.
— cloudsprout
Ordering Your Prime Rib or Booking Catering With Us
If you’d rather skip the oven math entirely, we hand-cut prime rib roast to the size and bone count you need, Frenched or left natural, and we can season it with one of our house-made marinades before you take it home.

When you want quality and flexibility that a supermarket case can’t match, a butcher shop makes the difference in trim, freshness, and custom handling, including allergy-safe preparation if you’re cooking for guests with dietary restrictions.
- Order a custom-cut roast sized to your guest count directly through our shop.
- Browse our marinades and prepared sides to round out the meal.
- Ask about full-service catering if you’d rather have us handle the whole main course for your event.
FAQ
What is the ideal temperature for cooking prime rib low and slow?
Most home cooks roast prime rib at 225°F to 250°F for the low phase, then finish at 500°F to 550°F for 6 to 10 minutes to brown the crust, according to Serious Eats’ reverse-sear method. The internal temperature that matters most is your pull point, set 5 to 10 degrees below your final target to account for carryover cooking.
How do most restaurants cook their prime rib?
Many restaurant kitchens use a version of the same reverse-sear principle: a slow, controlled roast to a target internal temperature, followed by a quick high-heat finish right before plating. This keeps the roast evenly cooked through a long holding or service window while still delivering a freshly browned crust at serving time.
Should I sear prime rib before roasting?
Searing before roasting builds early color but tends to widen the gray overcooked band near the surface, since that part of the meat cooks faster than the center. Finishing with a high-heat sear after the low roast, once the surface has already dried out, browns just as effectively with less risk of overcooking the exterior.
What is the 500 rule for prime rib roast?
The “500 rule” refers to a no-peek method where the roast cooks at a fixed time per pound in a 500°F oven, then the oven is turned off and the roast finishes using residual heat. It can work in a well-calibrated oven, but because ovens hold heat differently, it carries more risk of over or undercooking than cooking to an internal temperature with a thermometer.
Sources
- Canada
- Perfect prime rib recipe – Serious Eats
- How much prime rib per person? – BBQ Report
- The science of low-temperature cooking – Fine Dining Lovers


